Pump and Wet Well Installation & Cost Summary
As farmers ourselves, we have geared our product and instructions in a manner which allows the producer to do most if not all of the installation themselves. We encourage you to contact us with any questions, or to discuss any element of installation that you are unsure of or need clarification on. The heartiness and functionality of your system are a direct result of the quality of your installation. Included with your FFNP are instructions in written and digital form that show you a step by step process from start to finish.
Questions? We’re here to help
call us at 1-866-843-6744
To utilize a FFNP you must pinpoint and access a water source by creating a wet well. The development of your wet well generally requires one to contract a trachoe operator or well boring rig unless you have your own equipment. The function of the wet well is extremely important. The parameters of the wet well must be a minimum of 24″ diameter, and a minimum of 18′ deep in the ground.
It gives us access to our source, it provides a channel for the ground heat to rise from the bottom to the top of the well, it provides the static storage of water from our source that we suspend our plumbing into, and it functions as the point of strength that we mount our system to. Click here to view our applications diagram to help understand how we access different sources. Please review the specific wet well installation procedure for your application below.
Dugout or Pond
Refer to the Applications Illustration to help yourself visualize your installation
- The static water level inside the culvert will be at the same elevation as it is in the dugout (pond). Aim for static level of 5-15ft.
- Prepare your culvert. Use a hole saw to drill through the culvert wall to receive the supply line. We suggest installing this hole towards the bottom end of the culvert (you must remember that the underside of the supply line must be properly supported with packed soil so that when the dirt in your trench settles, it does not shear your supply line). Install a bulkhead fitting into the wall of the culvert to receive your supply line. Consider a floor in the culvert in the event that it is placed on a sand or gravel vein that may potentially syphon out your dugout.
- Plumb the supply line into the bulkhead fitting you installed in your culvert wall (we recommend 1½” low psi underground water line). Whatever you choose to use as your supply line, it must be strong enough to withstand the forces of back filling your supply trench, big enough to give you enough water supply to satisfy the number of Frostfree Nosepumps you are installing, and big enough to overcome any frictional resistance if you are installing your wet well at a considerable distance from your dugout. Back filling with a small amount of sand or fine soil around your supply line first will help protect your line from getting damaged from rocks or large chunks of soil etc. Remember if you compromise your supply line in any way during installation, you will compromise the supply of water to your wet well.
- Begin trenching from desired location of your wet well. This will be the deepest part of your trench as you are aiming for a minimum depth of 18′ for your minimum 20′ long culvert. Once your depth is achieved, start trenching towards your dugout in a straight line. As you trench towards your dugout, you want to gradually bring the elevation of your trench up to enter through your dugout wall at approximately 10′ deep (this can vary depending on how deep your dugout actually is, ultimately, you want your supply line coming through the wall of your dugout at floor level or slightly above floor level). Continue to trench towards your dugout until you run out of room (your tracks are at the edge of the bank).
- Go back to the start of your trench and install the culvert. Lower culvert into the trench with a sling so that approximately 24″ extends above ground level. Getting your culvert as level as possible makes installing the pumps on the lid a much easier process. Lay the supply line into the bottom of the trench and then back fill around the culvert to make sure it is effectively supported for when it starts filling with water. Go back to the dugout end of your trench and continue your trench from the side getting it as close to the water as you can without allowing the water to push into your trench. Lay the rest of your supply line into the trench and then back fill a section of the trench as close to the dugout as you can without kinking your supply line. Once your existing trench is back filled, then you can open the remaining small section of trench up into the water. At that point, you will be digging in water but you can gauge the level of water on the trackhoe arm to maintain elevation, and move your hoe bucket from side to side once the appropriate depth is achieved to ensure you have a nice smooth trench floor.
- Measure and cut your supply line so that it will extend into the dugout a desired distance. Attach your weighted dugout float intake to the end of your supply line. Extend your line with your dugout float out over the water to stretch out your line. Then hold your intake underwater to make sure it starts pulling water into the wet well. Once you confirm that water is gravity feeding into your wet well, you can release your dugout float into the water and the weight will descend down to the floor of your dugout.
- Go back and backfill the rest of your trench. Build up the dirt over the trench and around your wet well to accommodate for the ground settling. Your wet well is now complete!
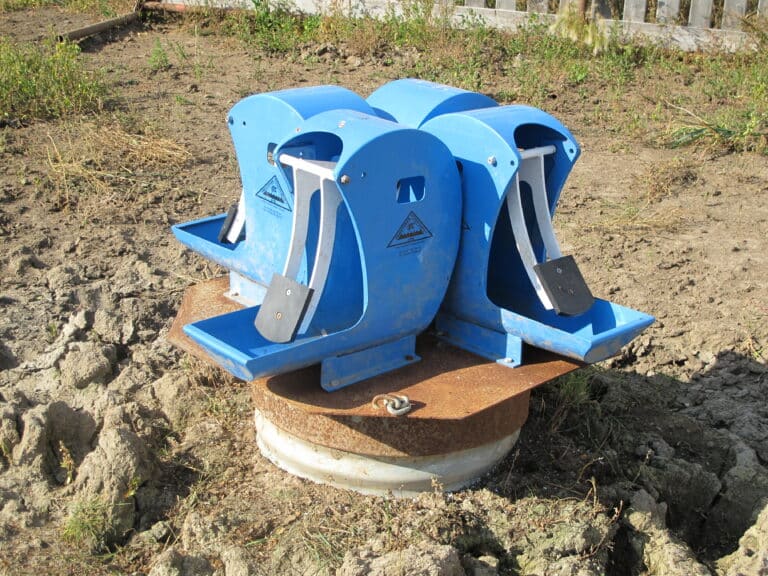
- Purchase or build a metal lid for the top of the culvert. (As per instructions with your FFNP)
- Follow detailed instructions and video provided to assemble FFNP plumbing, insulate wet well, attach pump to lid, and install on culvert.
- TURN IN YOUR LIVESTOCK!
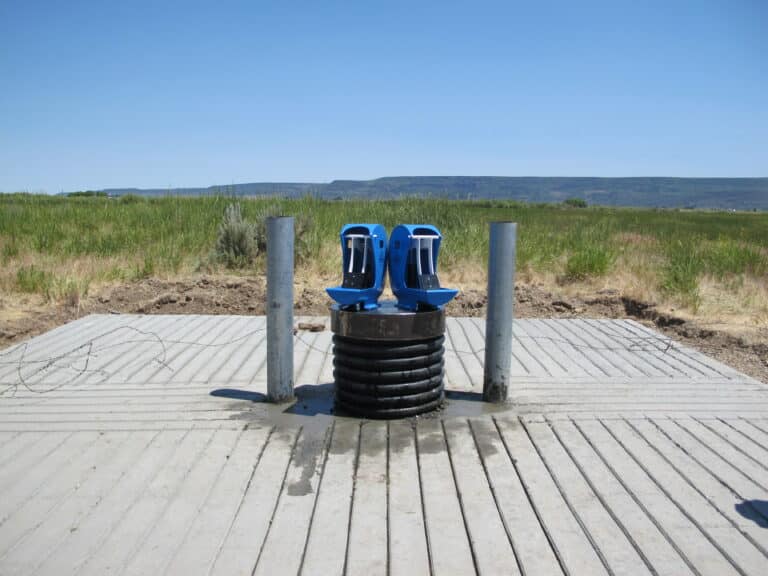
- Once the ground has settled, but before the weather gets cold, you MUST Install an insulated pad. It should measure approx. 20′ x 20′ around the wet well to avoid mud, protect the water quality, and most importantly create a frost break and eliminate ground compaction to diminish the frost zone in the ground around your wet well.
Spring Development
Refer to the Applications Illustration to help yourself visualize your installation
- To utilize a spring as a source of water it is best, in the interest of preserving quality and quantity, to have the cattle gathering on higher and firmer ground, some distance away.
- This installation is similar to a dugout installation.
- Dig into the spring source and submerge a perforated collecting tank (culvert) for the supply to flow into.
- Trench a line underground from the collecting tank to a second culvert on higher, firmer ground which will become the wet well you will install your FFNP on. Remember the well well needs to be a minimum of 18′ in the ground.
- Install a pitless adapter and a Hudson valve float in the wall of your second culvert to control the supply of water that gravity flows from your collector into the second culvert. Attach a handle to the removable part of the pitless adapter on the inside of the culvert which will give you the ability to pull your Hudson valve float to surface for any maintenance or repair it may need down the road.
- Excavate your culvert into the ground and plumb the supply line from the collecting tank into the pitless adapter installed in the wall of your second culvert.
- Follow steps 7-10 of dugout installation above. Click here to view the pitless adapter and Hudson valve float in our price list.
New Shallow Well
Refer to the Applications Illustration to help yourself visualize your installation
- Locate site for well. Some may consider using a well witcher (dowser).
- Drill 30″ diameter hole (for 24″ culvert) to minimum depth of 18′ (may need to go deeper to strike your source). Determine static water level and capacity of well. Each FFNP requires approximately 3 gallons per minute. Make sure your driller understands the system. The maximum lift is 50 vertical feet to the static level. If water table is at an elevation of 20′ or less, you can simply dig a trench with a trackhoe instead of drilling a hole.
- Perforate culvert for inflow at depth of aquifer.
- Install culvert so that approximately 24″ extends above ground level. Level culvert. Backfill with washed rock to top of perforations, then clay and bentonite (to seal for prevention of surface water contamination).
- Follow steps 7-10 of dugout installation above.
Over Existing Small Cased Well (single pump only)
Refer to the Applications Illustration to help yourself visualize your installation
- The casing in the existing well must have a minimum inside diameter of 5″ to accommodate the piston pump which has an outside diameter of 4″.
- Use a method of excavating around the casing down to a depth of 12′. Install a 24″ diameter culvert around the casing so that approximately 24″ extends above ground level. The casing must be centred in the culvert and the culvert must be plumb.
- Backfill and pack around culvert.
- Follow steps 7-10 of dugout installation above.
Pressure System
Refer to the Applications Illustration to help yourself visualize your installation
- Excavate a 24″ culvert into the ground where you want your watering station to be located. Remember, your culvert must be in the ground a minimum of 18″.
- Trench the pressure line from where it currently exists to your newly excavated culvert. Install a pitless adapter with Hudson valve float into the wall of your culvert at the same elevation as the pressure line, below frost zone in the ground.
- Plumb the pressure line into the pitless adapter and attach a handle to the removable part of the adapter on the inside of the culvert which will allow it to be pulled up to the top of the culvert for any service.
- Follow steps 7-10 of dugout installation above.
Installation Costs
The price of a complete installation varies depending on your water source, how many head of livestock you need to water, and how much of the installation you can complete on your own. Below is a generalized breakdown of the cost to install one Frostfree Nosepump livestock watering system. Remember that for larger herds, you can combine multiple units on one wet well.
This must be considered as an ESTIMATE only. Prices are subject to change and do not include shipping, mileage or tax.
These prices reflect buying all associated parts from Frostfree Nosepumps Ltd. You can further reduce the cost of your project by constructing your own plumbing, installation kit, and lid. Click here for Frostfree Nosepump and related accessories pricing.
Frostfree Nosepumps Ltd. ships parts and pumps all over the world. Contact us to get a shipping quote for whatever you need.
Questions? We’re here to help
call us at 1-866-843-6744
| General Installation Parts List | Price (CAD) |
|---|---|
| Frostfree Nosepump Livestock Waterer | $1699 |
| Pipe & Connecting Rod (pre-built plumbing) | $220 |
| Cribbing (24″I.D. X 6m poly culvert) – pickup only | $1150 |
| Cribbing Lid (29″ O.D.) Single Hole | $425 |
| Culvert Insulation Package (24″) | $425 |
| Excavation (approximate) | $1000 |
| Insulated Cement Pad w/ rebar (wood deck approx half the cost) | $2000 |
| Total | $6919 |